Introduction to Azure Pipelines

![]()
In my previous post, I mentioned that I was using Azure Pipelines to build and deploy this blog, so now I will share how you can do the same. In my case, I'm using pipelines to build my Gatsby.js site and then deploy it to a Firebase web site.
About Azure Pipelines
Azure Pipelines is a great cloud-based service to build, test and deploy your sites or apps with Continuous Integration and Continuous Deployment. Is part of the Azure DevOps offering, which also offers you other services such as private repositories (Azure Repos), backlogs (Azure Boards), testing tools (Azure Test Plans) and a way to create, host and share packages such as npm or NuGet packages (Azure Artifacts). And if that was not enough, there is an extensions marketplace with a really nice amount of extensions.
One of the things I like the most it's the GitHub integration. You can start with Azure DevOps using your GitHub account, and of course, use your own GitHub repository instead of an Azure Repo. What's more, you can use any git repository. Moreover, you have the Azure Pipelines app in the GitHub Marketplace which enables deep integration in the Pull Requests with checks and statuses.
Additionally, you can start for free! You have 1 parallel job with up to 1800 minutes per month to work with Pipelines, which is really good to have without paying. What's more, if you are working on an open source project, you have 10 Free parallel jobs with unlimited minutes per month. That includes having multiple platforms (i.e. windows, linux and even macOS) and working with the language of your choice.
Getting started
Based on the quick introduction to the service above, I imagine that it's easy to understand why I choose Pipelines to build and deploy my site, so now, let me show you how I'm doing my pipeline to build my gatsby site and then deploy it to firebase.
To start, I have the site in a private repository in GitHub and my DevOps account already created (I will bypass that as it's well documented and you have several options to do it, such as using your Microsoft or GitHub accounts).
Now, you need to add your repository in Pipelines. To do this, navigate to Pipelines page in the DevOps site and click on the New pipeline button. Then, select your repository and follow the wizard.
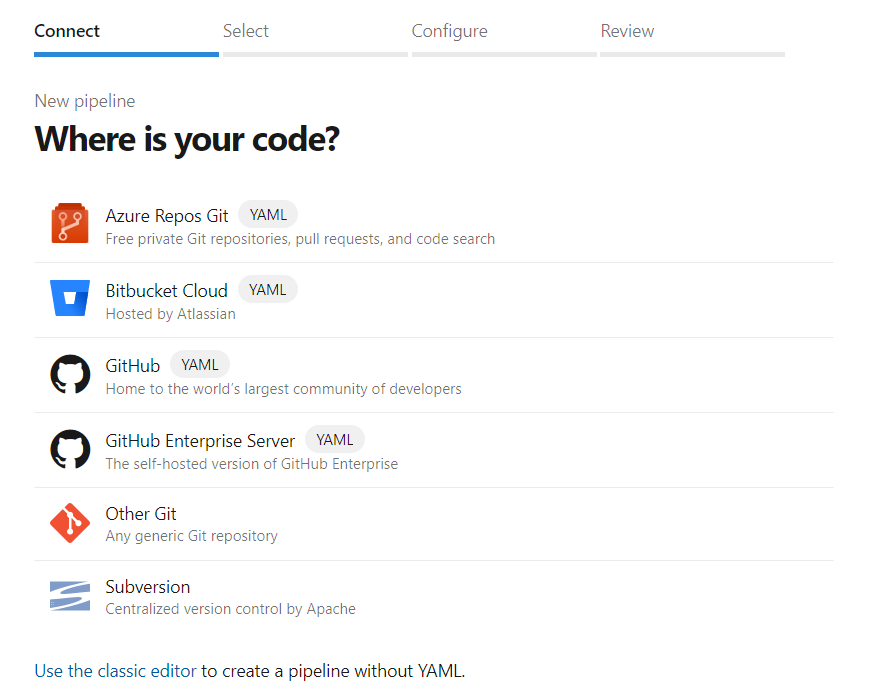
In my case, I selected my private GitHub repository and continue with the authorization flow which includes adding the Azure Pipelines App to the repository. After that, you need to configure the pipeline which is to create the initial set of tasks that you will have. You have several templates to use as base, in my case I choose the node.js option as I knew that I need to install the npm dependencies and run some npm scripts.
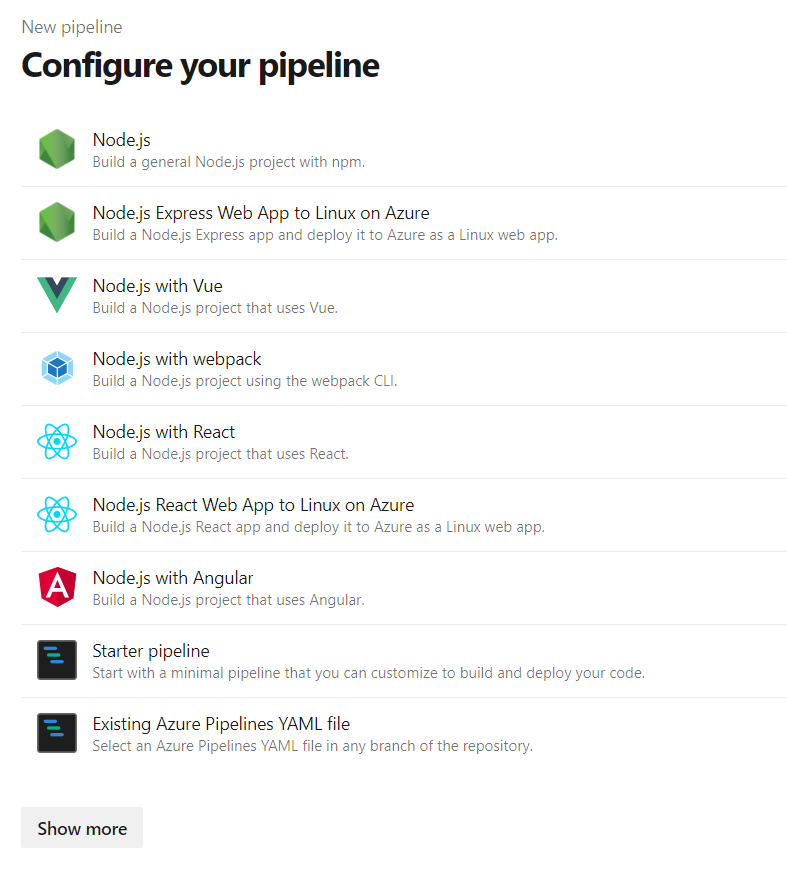
Once you selected the base configuration you will see a yaml file which it will be committed to the repository when you click save and run.
Before doing that, let's see what I currently have in that file and understand each part.
trigger:
- master

pool:
  vmImage: 'ubuntu-latest'

steps:
- task: NodeTool@0
  inputs:
    versionSpec: '10.x'
  displayName: 'Install Node.js'

- script: |
    npm install
    npm run build
  displayName: 'npm install and build'

- task: CopyFiles@2
  inputs:
    contents: |
      public/**
      .firebaserc
      firebase.json
    targetFolder: $(Build.ArtifactStagingDirectory)

- task: PublishBuildArtifacts@1
  inputs:
    pathtoPublish: '$(Build.ArtifactStagingDirectory)'
    artifactName: drop
This is what a Job looks like. It has a trigger, a pool and a set of steps defined in it. The trigger is a list of what will start the job. In this case, I only have the master branch, but you can include tags, branches or even paths.
Then, you have the pool entry where you define the vmImage. You have multiple options too choose from. In my case, I used the ubuntu-latest but with no reason as I don't have a strong requirement.
Finally, we have the list of steps. First, we install node 10.x along with npm. After that, we execute the npm install and the npm run build scripts. The first one to install the dependencies and the second one is the one responsible to create the static html pages calling gatsby build in it. Finally, we copy all the assets to the Artifact staging directory and we publish the drop.
To deploy the site, I'm using a Release which consume the artifact drop and have a new job to deploy that artifact.
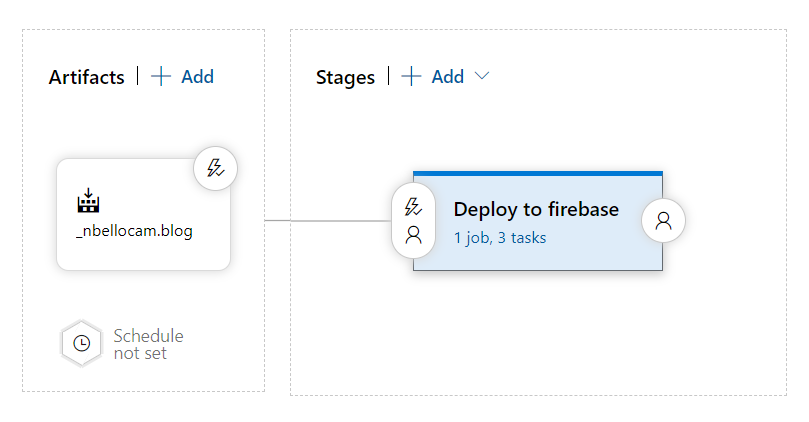
This new job will download the build artifact, then install the firebase tools using npm and then run a command line script.
steps:
- task: DownloadBuildArtifacts@0
  displayName: 'Download Build Artifacts'
  inputs:
    artifactName: drop
- task: Npm@1
  displayName: 'npm custom'
  inputs:
    command: custom
    verbose: false
    customCommand: 'install -g firebase-tools'
- script: |
   echo Use the environment variables input below to pass secret variables to this script

   firebase deploy --token $FIREBASE_TOKEN
  workingDirectory: '$(System.DefaultWorkingDirectory)/_nbellocam.blog/drop'
  displayName: 'Command Line Script'
Note that I started using this approach in the past, but you can also use a pipeline with multiple stages. This is the same as what we saw, but you define everything in a single azure-pipelines.yml file. I will go deeper with that in the following article.
Summing up
Starting with Azure DevOps and especially with Azure Pipelines, it's not only easy but also cheap and convenient. It's a great tool to have, specially of web development.
For more information, you can always go to the Azure Pipeline documentation.