Creating an API with Azure Functions, Azure Cosmos DB and TypeScript

As web developers, having simple tools to create a powerful API without too much effort sound like a dream come true. I recently had the chance to play around with Azure Functions with TypeScript to create an API and, as I had to store and consume some information, I also used the Azure Cosmos DB bindings for Azure Functions. In this post, I want to share my experience with these awesome tools so you can also use them to make your life easier.
Azure functions with TypeScript
Starting with Azure functions it's not hard thanks for the tooling available. First, you need to install the Azure Functions Core Tools. A great thing about these tools is that the newer versions are developed with .NET Core so they are multiplatform.
Creating a function project
Now that you installed the tools, let's create our first function. In the command line, run the following command to create a new project named MyFunctionProj using TypeScript
func init --language typescript --worker-runtime node MyFunctionProjExecuting this command will create some files and a folder, let's review them:
- .vscode: This is the Visual Studio Code configuration folder, and inside you will find an
extensions.jsonfile with a new recommendation for this kind of project. - .funcignore: This file is similar to a .gitignore but for the deployment of the functions.
- host.json: This files contains global configuration options that affect all functions in the project. For example, you can find here the extensions such as the CosmosDB bindings that we will use later.
- local.settings.json: This file stores app settings, connection strings, and settings used by local development tools.
- package.json: This is the usual node.js metadata file with all the dependencies and scripts
- tsconfig.json: This is the usual TypeScript configuration file.
If you open the package.json file, you can see that there are some scripts in there, this is because of TypeScript as we need to transpile the code to javascript before executing the functions.
"scripts" : {
    "build": "tsc",
    "build:production": "npm run prestart && npm prune --production",
    "watch": "tsc --w",
    "prestart": "npm run build && func extensions install",
    "start:host": "func start",
    "start": "npm-run-all --parallel start:host watch",
    "test": "echo \"No tests yet...\""
  },
Note: As you can see, some of the scripts uses
funcwhich is the Azure Functions Core Tools that you installed previously. If you have a continuous integration/deployment server such as Azure Pipelines, you can add theazure-functions-core-toolspackage as dev dependency so the func command is available when running thebuild:productionscript.
Creating a function
Now, let's add a new function to the project named GET-Data that will be trigged by a http request using the following command in the command line.
func new --name GET-Data --template "HttpTrigger"This command adds a new folder with the name that we specified. Inside that folder, you can find two files:
- functions.json: contains all the information about the function itself, like the script file and the bindings.
- index.ts: contains the TypeScript file with the logic of your function.
Note that the functions.json file targets a js file located in a dist folder, this is the output folder of the transpilation of the TypeScript file. If you renamed the folder, don't forget to update that entry.
Before testing the function, you need to install the dependencies (i.e. use npm install). Now, execute npm start and you should see the output of the terminal showing a lot of information due to all the processes. Once the functions are up and running, navigate to http://localhost:7071/api/GET-Data?name=Nicolas and you should see a message.
Let's review the code. The file contains an asynchronous function that has two parameters, the context and the request. From the request you can obtain information like the query parameters and the body which is already parsed in case of json content. To return a value, based on what is defined in the function.json file, a res property in the context is used. You can change the response status code as well as the body.
import { AzureFunction, Context, HttpRequest } from "@azure/functions"

const httpTrigger: AzureFunction = async function (context: Context, req: HttpRequest): Promise<void> {
    context.log('HTTP trigger function processed a request.');
    const name = (req.query.name || (req.body && req.body.name));

    if (name) {
        context.res = {
            // status: 200, /* Defaults to 200 */
            body: "Hello " + (req.query.name || req.body.name)
        };
    }
    else {
        context.res = {
            status: 400,
            body: "Please pass a name on the query string or in the request body"
        };
    }
};

export default httpTrigger;
Finally, let's update the bindings in the function.json file to work only with GET requests instead of GET and POST. To do this, remove the "post" entry in the methods array of the httpTrigger binding. Additionally, update the route by adding the following "route":"articles/{blogId}/{postId}" to that binding. You should end with the following.
"bindings": [
    {
        "authLevel": "function",
        "type": "httpTrigger",
        "direction": "in",
        "name": "req",
        "methods": [
            "get"
        ],
        "route":"articles/{blogId}/{postId}"
    },
    {
        "type": "http",
        "direction": "out",
        "name": "res"
    }
],
The Cosmos DB bindings
Now that we have a function up and running, we still need to save and read data. The idea is to use CosmosDB to do this, but you have two options here, you can use the CosmosDB SDK for js or you can use the Azure Cosmos DB bindings for Azure Functions 2.x. In this post we will use the second option to simplify our logic, however, you might need to use both approaches in more complex scenarios. Additionally, the bindings only support the use with the SQL API. If you want to use any of the other supported APIs (e.g. Cassandra API, Gremlin API, etc.) you should use the static clients for those APIs.
Let's start working locally targeting the CosmosDB emulator.
Once the emulator is installed and running, you need to configure the connection string in the function project settings, to do this, execute the following command. By doing this, you should see the new connection string in the local.settings.json file
func settings add CosmosDBConnection "AccountEndpoint=https://localhost:8081/;AccountKey=C2y6yDjf5/R+ob0N8A7Cgv30VRDJIWEHLM+4QDU5DE2nQ9nDuVTqobD4b8mGGyPMbIZnqyMsEcaGQy67XIw/Jw==" --connectionStringNote: The connection string is always the same in the emulator unless you change it. If you did so, update that command accordingly.
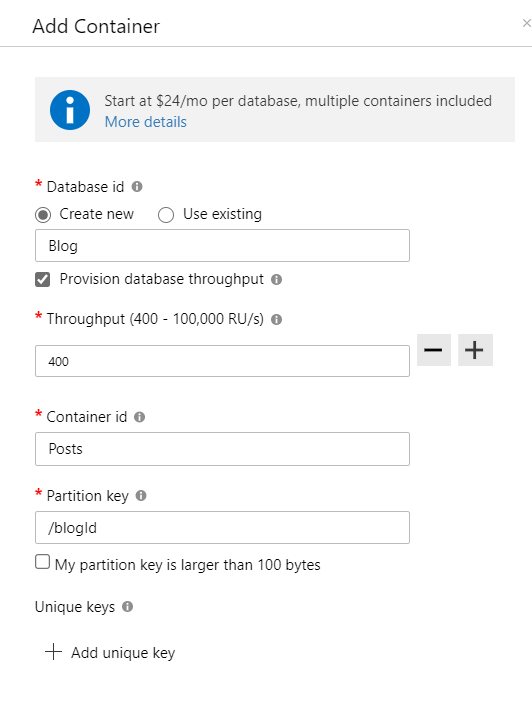
Navigate to the local emulator explorer and create a new database named Blog and a new collection named Posts. Use as partition key a property named /blogId.
Navigate to the new container and add a new entry with the following json. Then click save and a few new properties should appear.
{
    "id": "my-new-post",
    "blogId": "my-blog-id",
    "title": "My new post in my blog",
    "content": "awesome content here",
    "comments": [
        {
            "author": "Nicolas",
            "content": "Awesome post!"
        }
    ]
}
Now, we need to install the CosmosDB bindings. To do that, open the host.json file and replace the content with the following.
{
  "version": "2.0",
  "extensions": {
      "cosmosDB": {}
  }
}
Let's also add a new binding in the function to retrieve the post that you created in the database before. Add the following in the bindings array.
{
    "type": "cosmosDB",
    "name": "postItem",
    "databaseName": "Blog",
    "collectionName": "Posts",
    "connectionStringSetting": "CosmosDBConnection",
    "direction": "in",
    "Id": "{postId}",
    "PartitionKey": "{blogId}"
}
Note: All the parameters were defined before, the databaseName and the collectionName are the ones created in CosmosDB, the connectionStringSetting is the one used in when you execute
func settings add. The Id and PartitionKey are using a reference to the parameters in the route defined before.
Let's update the function code now to respond with the item that was retrieved from the binding by replacing the content with the following.
import { AzureFunction, Context, HttpRequest } from "@azure/functions"

const httpTrigger: AzureFunction = async function (context: Context, req: HttpRequest, postItem: any): Promise<void> {
    context.log('HTTP trigger function processed a request.');
    context.res = {
        // status: 200, /* Defaults to 200 */
        body: postItem
    };
};

export default httpTrigger;
If you run the function now with npm start you will can retrieve the content of the database by navigating to http://localhost:7071/api/articles/my-blog-id/my-new-post.
You could also use the sqlQuery property instead to Id and PartitionKey to have more complex queries in place like: "sqlQuery": "SELECT COUNT(p.comments) FROM p where p.id = {postId} AND p.blogId = {blogId}" to have the amount of comments in that post.
{
    "type": "cosmosDB",
    "name": "postItem",
    "databaseName": "Blog",
    "collectionName": "Posts",
    "connectionStringSetting": "CosmosDBConnection",
    "direction": "in",
    "sqlQuery": "SELECT COUNT(p.comments) FROM p where p.id = {postId} AND p.blogId = {blogId}"
}
To save new information, you also have bindings, but in this case, you use the value out for the direction and you don't specify anything else as you will be saving the entire object including the both ids.
{
    "type": "cosmosDB",
    "name": "updatedPost",
    "databaseName": "Blog",
    "collectionName": "Posts",
    "createIfNotExists": false,
    "connectionStringSetting": "CosmosDBConnection",
    "direction": "out"
}
To make things simpler, let's update the existing function to save the last visit date in the object. You can save the document by using the context.bindings.updatedPost where updatedPost is the name of the binding.
const httpTrigger: AzureFunction = async function (context: Context, req: HttpRequest, postItem: any): Promise<void> {
    context.log('HTTP trigger function processed a request.');
    const lastVisit = new Date();
    context.bindings.updatedPost = JSON.stringify({ ...postItem, lastVisit });
    context.res = {
        // status: 200, /* Defaults to 200 */
        body: postItem
    };
};
If you navigate again to http://localhost:7071/api/articles/my-blog-id/my-new-post and refresh the site, you will see the new lastVisit property being updated in each refresh.
Summing up
Well, that's a lot of information, but I think that you might find it useful to create simple APIs that need to save and read information. For more information you can go to the Azure Cosmos DB bindings for Azure Functions 2.x documentation.